今回はGAS(Google Apps Script)に関して書いていきます。
以前、「GASでNotionにデータ登録するWebページを作ってみる」記事を投稿しました(以下リンク)。
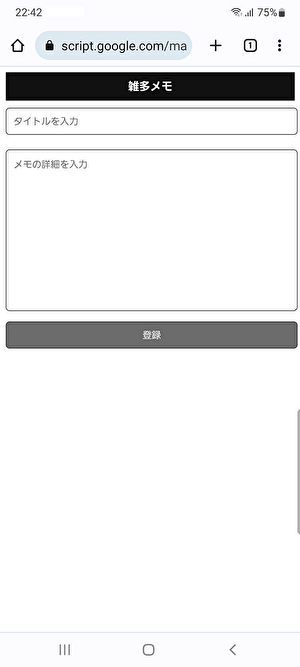
上記の記事の時点では、登録完了時に「登録が完了しました」のメッセージが表示されます。
このメッセージだけでは少し心細いので、直近のデータ(3件)を表示するように対応しました。
今回の記事では、その辺りに関して書いていきます。
変更内容(画像)
まずは手っ取り早く、変更前後の画像を載せます。
変更前
変更後
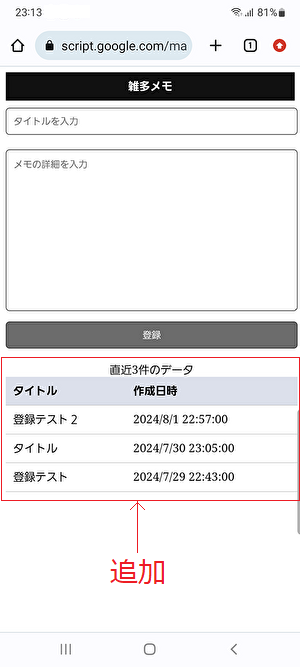
こんな感じです。
直近3件のデータを表示するように対応しました。
「タイトル」と「作成日時」を表示するようにしています。
データ登録してみる
実際にデータ登録してみると、以下のようになります。
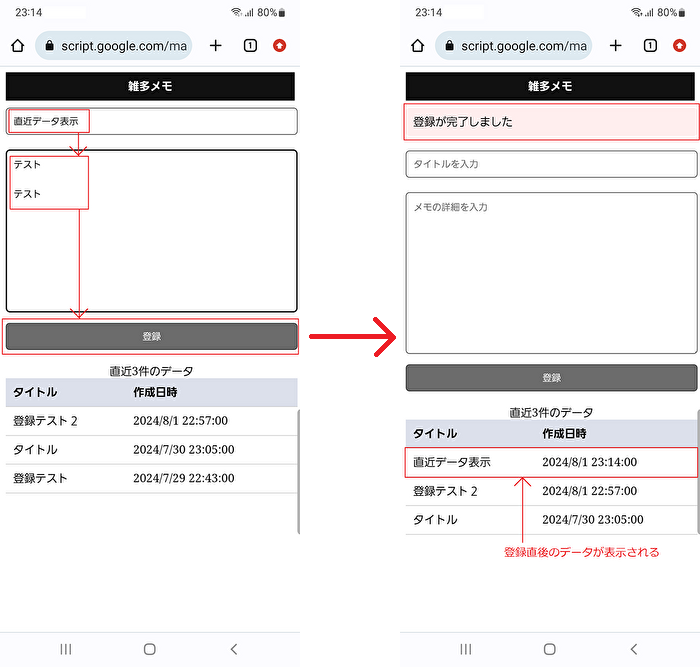
登録が完了すると、直近3件のデータの一番上に表示されます。
「タイトル」や「作成日時」から、直前に登録したデータであることが分かります。
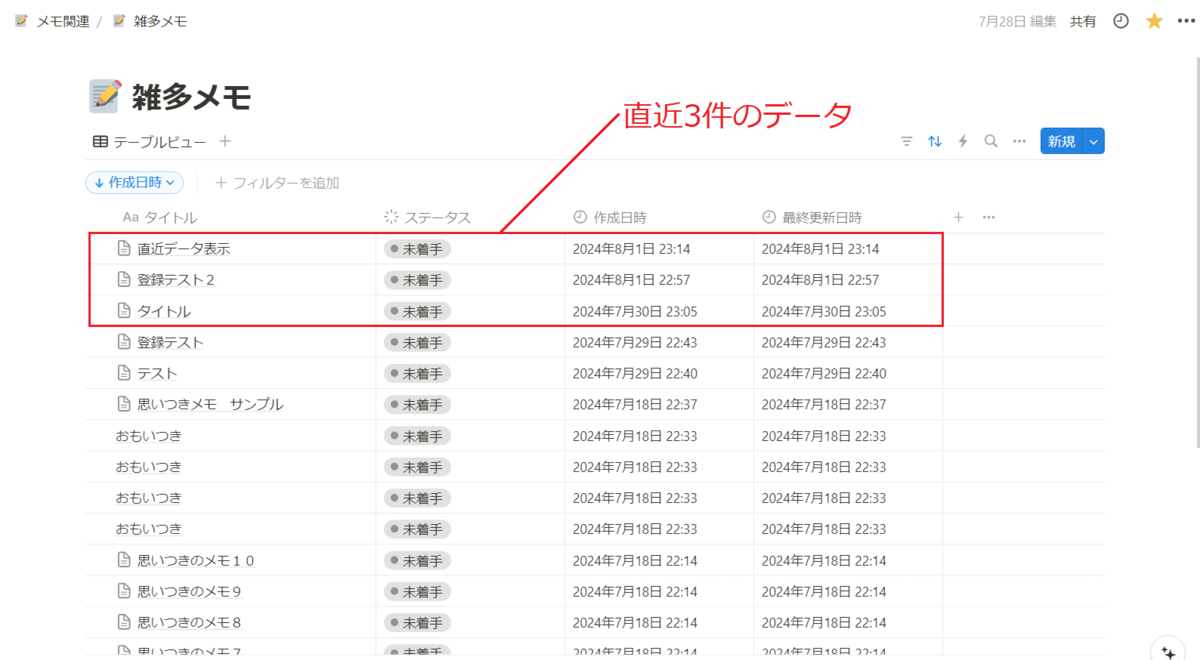
実際のNotionデータベースを確認してみると、直近3件のデータが表示されていることが分かります。
※作成日時の降順でソート
プログラム
プログラムは以下、4ファイルです。
- main.gs
- notion.gs
- index.html
- css.html
変更:main.gs
/**
 * GET処理
 */
function doGet() {
  // 表示処理
  return index();
}

/**
 * POST処理
 */
function doPost(e) {
  // 作成処理
  createNotionPage(e.parameter);
  // 完了メッセージ
  const msg = "登録が完了しました";
  // 表示処理
  return index(msg);
}

/**
 * 表示処理
 */
function index(msg = null) {
  // HTML側に渡す変数をセット
  const template = HtmlService.createTemplateFromFile('index');
  template.deployURL = ScriptApp.getService().getUrl();
  template.msg = msg;
  template.latestNotionData = queryNotion();
  // タイトルやmetaタグをセット
  const htmlOutput = template.evaluate();
  htmlOutput.setTitle('雑多メモ');
  htmlOutput.addMetaTag('viewport', 'width=device-width, initial-scale=1');
  return htmlOutput;
}

/**
 * インクルード処理
 */
function include(filename) {
  return HtmlService.createHtmlOutputFromFile(filename).getContent();
}
変更:notion.gs
// Notionインテグレーションキー
const NOTION_API_KEY = PropertiesService.getScriptProperties().getProperty('NOTION_API_KEY');
// 雑多メモNotionのデータベースID
const DATABASE_ID = PropertiesService.getScriptProperties().getProperty('DATABASE_ID');

/**
 * headers
 */
const headers = {
  'Notion-Version': '2022-06-28',
  'Authorization': 'Bearer ' + NOTION_API_KEY,
  'Content-Type': 'application/json'
};

/**
 * Notionページ作成処理
 */
function createNotionPage(postParam) {
  // URL
  const url = 'https://api.notion.com/v1/pages';
  // パラメータ
  const params = {
    'method': 'POST',
    'headers': headers,
    'payload': JSON.stringify(payloadForCreate(postParam)),
  };
  // 実行
  UrlFetchApp.fetch(url, params);
}

/**
 * データ登録に必要なパラメータを組み立てる
 */
function payloadForCreate(postParam) {
  return {
    'parent': {'database_id': DATABASE_ID},
    'properties': composeProperties(postParam),
    'children': composeBlocks(postParam)
  };
}

/**
 * データ登録時のプロパティ
 */
function composeProperties(postParam) {
  return {
    'タイトル': {
      'title': [{
        'text': {
          'content': postParam.title
        }
      }]
    }
  };
}

/**
 * データ登録時のブロック
 */
function composeBlocks(postParam) {
  return [{
    "type": "paragraph",
    "paragraph": {
      "rich_text": [{
        "type": "text",
        "text": { "content": postParam.memo }
      }]
    }
  }]
}

/**
 * Notion検索
 */
function queryNotion() {
  // URL
  const url = 'https://api.notion.com/v1/databases/' + DATABASE_ID + '/query';
  // パラメータ
  const params = {
    'method': 'POST',
    'headers': headers,
    'payload': JSON.stringify(payloadForQuery),
  };
  // 実行
  const result = JSON.parse(UrlFetchApp.fetch(url, params));
  // 取得結果を加工
  const retArray = [];
  for (const data of result.results) {
    const title = data.properties['タイトル'].title[0].plain_text;
    const createdTime = data.properties['作成日時'].created_time;
    retArray.push({
      title: title,
      createdTime: new Date(createdTime).toLocaleString('ja-JP'),
    });
  }
  return retArray;
}

/**
 * payload(検索用)
 */
const payloadForQuery = {
  'page_size': 3,
  'sorts': [
    {
      'property': '作成日時',
      'direction': 'descending'
    },
  ]
};
変更:index.html
<!DOCTYPE html>
<html>
  <head>
    <base target="_top">
    <?!= include('css'); ?>
  </head>
  <body>
    <div class="header">雑多メモ</div>
    <div class="container">
      <? if (msg) { ?>
        <div class="msg-area"><?= msg ?></div>
      <? } ?>
      <form method="post" action="<?= deployURL ?>">
        <input type="text" name="title" placeholder="タイトルを入力" />
        <textarea name="memo" rows="10" placeholder="メモの詳細を入力"></textarea>
        <button type="submit">登録</button>
      </form>
      <table>
        <caption>直近3件のデータ</caption>
        <thead>
          <tr>
            <th>タイトル</th>
            <th>作成日時</th>
          </tr>
        </thead>
        <tbody>
          <? for (const notionData of latestNotionData) { ?>
            <tr>
              <td><?= notionData.title ?></td>
              <td><?= notionData.createdTime ?></td>
            </tr>
          <? } ?>
        </tbody>
      </table>
    </div>
  </body>
</html>
変更:css.html
<style>
  .header {
    padding: 10px;
    text-align: center;
    background-color: #111;
    color: #fff;
    font-weight: bold;
  }
  .container {
    width: 400px;
    margin: 0 auto;
  }
  .msg-area {
    width: 100%;
    padding: 10px;
    margin: 10px 0;
    box-sizing: border-box;
    background-color: #fee;
    border-radius: 5px;
  }
  input[type="text"] {
    font-family: inherit;
    width: 100%;
    padding: 10px;
    margin: 10px 0;
    line-height: 1;
    box-sizing: border-box;
    border-radius: 5px;
    border: 1px solid #313131;
  }
  textarea {
    font-family: inherit;
    width: 100%;
    margin: 10px 0;
    padding: 10px;
    line-height: 1.5;
    box-sizing: border-box;
    border-radius: 5px;
    border: 1px solid #313131;
  }
  button {
    width: 100%;
    padding: 10px;
    color: #fff;
    background-color: #6C6C6C;
    border: 1px solid #313131;
    border-radius: 5px;
  }
  button:hover {
    background-color: #9C9C9C;
    transition: 0.3s;
    cursor: pointer;
  }
  table {
    width: 100%;
    border-collapse: collapse;
    margin-top: 20px;
  }
  table thead {
    background-color: #dce0eb;
  }
  table th, table td {
    text-align: left;
    padding: 10px;
    border-bottom: 1px solid #ccc;
  }
</style>
おわりに
ということで、「【GAS-Web】Notionデータ登録アプリに直近3件のデータを表示する」に関してアレコレ書いてみました。
前回の記事までは、NotionアプリのAndroidウィジェットと機能的にそこまで大きな差はありませんでした。
ですが今回の対応で、自分好みの機能が追加されました。
そして他にも追加したい機能があります。
自分好みにどんどんカスタマイズできるところが、GASで実装しているメリットですね。
その分、実装に時間を要しますが。
今後も追加したら、今回のように記事にしたいと思います。
今回の記事が参考になれば幸いです。
関連記事
GAS(Google Apps Script)に関してはいくつか記事にしています。
気になる記事があればぜひ。
GASの活用事例
GASでNotionにデータ登録するWebページを作ってみる - 派生記事